This tutorial gets you started with creating scripts to read and write data in Snowflake. You will learn how to:
- Connect to a Snowflake database with Python.
- Read data from a table.
- Write data to a table.
When you’ve mastered these steps (they’re quite simple), I’ll go into several ways to secure the account details you use for the connection.
Table of Contents
Optional: Create A Virtual Environment For Practicing
If you want to follow along with our sample code, you can optionally create a virtual environment. To do so, run these lines on your terminal:
mkdir snowflake
cd snowflake
python -m venv env
source env/bin/activate
This code creates a directory called snowflake and an isolated virtual environment.
Step 1: Install The Snowflake Connector
The first thing to do when using Python with Snowflake is to install the Snowflake Connector. This is a Python package that can connect to Snowflake and perform various operations like executing SQL statements, reading, and writing data.
If you don’t already have it installed, you can do so using pip. Run this code in your terminal:
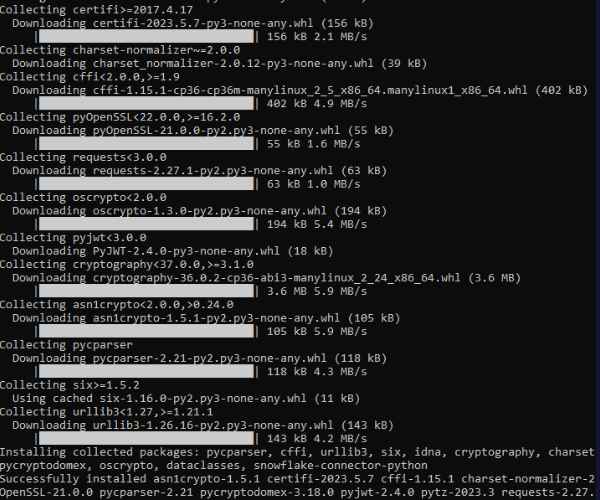
pip install snowflake-connector-pythonYou should see output like this as the package is downloaded and installed:
Did you get an error?
Here’s a tip: when I ran this for the first time, I got this error message:
error: package directory ‘src/find_namespace:’ does not exist
The solution was to update my versions of pip and setuptools with these commands:
pip install --upgrade pip
pip install --upgrade setuptools
When I ran the pip install again, I was successful.
Step 2: Prepare Your Connection Details
Before you write the Python code, you need to know these connection details:
- Username
- Password
- Account
- Warehouse
- Database
- Schema
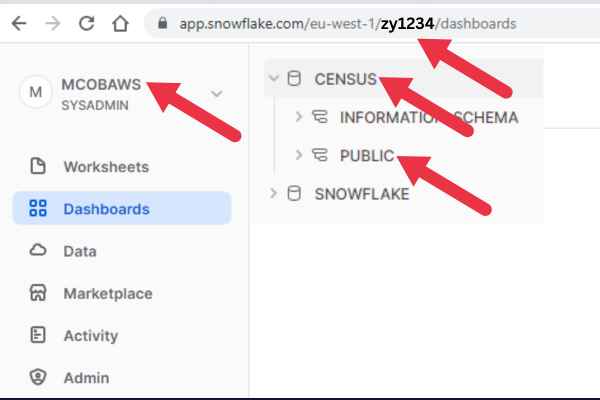
If you’re not sure what these are, log into the Snowflake website interface and use the left pane to navigate to the database schema you intend to read data from.
You can grab all the detail you need from this page, except for your password and the warehouse you intend to use.
To get a list of available warehouses, run this SQL statement in a SQL worksheet within the interface:
SHOW WAREHOUSES;Step 3: Connect And Retrieve Data From Snowflake With Python
This sample Python script includes all you need to:
- connect to a Snowflake database schema.
- execute a select statement on a table.
- loop through the resultset and prints each row.
Copy this script and change the connection detail and table name.
import snowflake.connector

# Create a connection object
conn = snowflake.connector.connect(
    user='<username>',
    password='<password>',
    account='<account>',
    warehouse='<warehouse>',
    database='<database>',
    schema='<schema>'
)

# Create a cursor object
cur = conn.cursor()

# Execute a query to fetch data from your table
cur.execute("SELECT * FROM <your_table_name>")

# Fetch the result
result = cur.fetchall()
for row in result:
    print(row)

# Close the cursor and the connection
cur.close()
I’m assuming that you have a database, schema, and table to work with. If not, follow our quick guide to creating a table in Snowflake.
Step 3: Write Data To Snowflake With Python
In this step, your Python script connects to Snowflake and writes a single row to a table.
This requires a simple amendment to the previous script. Replace the two sections that executes the SQL statement and loops through the result with:
# Execute a query to write data into your table
cur.execute("""
    INSERT INTO <your_table_name> (column1, column2)
    VALUES ('value1', 'value2')
""")
How To Secure Your Credentials With Environment Variables
The sample script hard-codes your credentials, which is a bad practice. It’s fine for a quick test but let’s get this project into shape.
A common way to avoid hard-coding is to use environment variables. You can set these variables in your shell, and they can be accessed from Python using the os module.
If you run the code below on your terminal, the details will be set for a single session.
export SNOWFLAKE_ACCOUNT=<your_account>
export SNOWFLAKE_USER=<your_username>
export SNOWFLAKE_PASSWORD=<your_password>
export SNOWFLAKE_WAREHOUSE=<your_warehouse>
export SNOWFLAKE_DATABASE=<your_database>
export SNOWFLAKE_SCHEMA=<your_schema>
To make these variables persistent across sessions, you can add these lines to your shell’s profile script.
Let’s say you are using Ubuntu and you want to edit the .bashrc file. Follow these steps.
- Open the file in the vi text editor: vi ~/.bashrc
- Press “G” to jump to the end of the file.
- Press “i” for insert mode.
- Start typing the lines at the end of the file.
- Save and close by entering :wq!
- Source the file by entering source ~/.bashrc
You now need to edit the connection section in your Python script like this:
import os
# Create a connection object
conn = snowflake.connector.connect(
    user=os.environ.get('SNOWFLAKE_USER'),
    password=os.environ.get('SNOWFLAKE_PASSWORD'),
    account=os.environ.get('SNOWFLAKE_ACCOUNT'),
    warehouse=os.environ.get('SNOWFLAKE_WAREHOUSE'),
    database=os.environ.get('SNOWFLAKE_DATABASE'),
    schema=os.environ.get('SNOWFLAKE_SCHEMA')
)
Don’t forget to import the os module at the top of the script.
How To Secure Your Credentials With A Secrets File
An alternative way is to store your credentials in a secrets file.
To do so, create a script called secrets.py that looks like this:
SNOWFLAKE_ACCOUNT = '<your_account>'
SNOWFLAKE_USER = '<your_username>'
SNOWFLAKE_PASSWORD = '<your_password>'
SNOWFLAKE_WAREHOUSE = '<your_warehouse>'
SNOWFLAKE_DATABASE = '<your_database>'
SNOWFLAKE_SCHEMA = '<your_schema>'
You can then add additional security to this file. Once you’re ready to use it, here is how to access the details at the top of your Python scripts:
from secrets import SNOWFLAKE_ACCOUNT, SNOWFLAKE_USER, SNOWFLAKE_PASSWORD, SNOWFLAKE_WAREHOUSE, SNOWFLAKE_DATABASE, SNOWFLAKE_SCHEMA