This tutorial shows you how to use Uptime Robot to create a monitor that alerts you if your home page isn’t loading for visitors.
When you create your free account, you can start monitoring a website immediately. There are several types of monitoring to choose from, but you’ll probably start with checking the availability of the home page.
Table of Contents
How to Use Uptime Robot To Monitor Your Website
In this tutorial, we’ll be focusing on the type of monitor which checks that a web page is available. This is the most commonly used monitor.
You can create up to 50 monitors with the free plan. So, if you wanted to place a monitor on every web page on your website, then you might run out of free monitors. But this is not a good use of resources for checking the uptime of your website.
You should start with the most basic check of whether your website is down. This would mean that all pages are unavailable. So, we usually put the first monitor on the Home Page of the website. This tutorial steps through the setup process.
If this is your first time working with website monitoring, we have a general guide to Uptime Robot. This should answer any basic questions about the service. But if you want to fire ahead and set up a monitor, continue reading this tutorial.
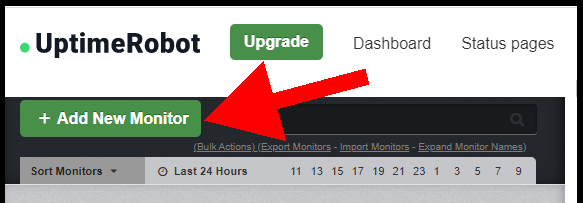
Step 1. Create A New Uptime Robot Monitor
The “Add New Monitor” button is on the top left of the home page or Dashboard screen.
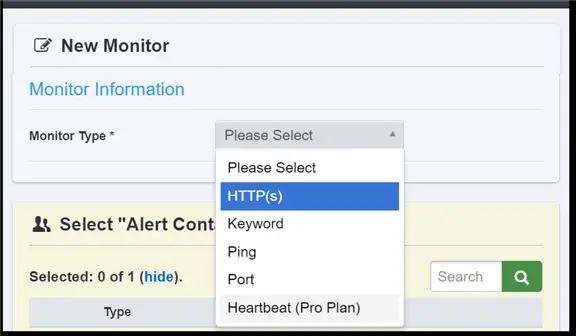
Step 2. Choose The First Monitor Type – HTPP(s)
The free plan gives you four types of monitors. We are going to choose the first type on the list: the HTTP(s) monitor.
This type behaves like your web visitors: the monitor sends a request to the specified web page. If the web page does not respond i.e. does not load properly, then you will be alerted.
Check out our Uptime Robot Guide for a description of the other types and when you might use them.
Step 3: Set A Friendly Name For Your Uptime Robot Monitor
This is important when you will be monitoring several websites. The name appears in your email or SMS alerts and is also part of the Uptime Robot dashboard.
Email alerts will have a subject line reading “Monitor is UP: [Friendly Name]”. So, if you have several monitors, you don’t want to use generic names.
You’ll make like easy for yourself if you choose a good descriptive moniker for the alert.
Step 4: Provide Your Home Page URL
You can provide any URL of course, but we are setting up the most basic and essential monitoring on our website. So, we choose the home page of the website.
Include the full address i.e. this should start with https: as long as your website is secure.
Does your webpage actually start with http:? This means it is not secure. You should address this by adding an SSL certificate. However, don’t let that stop you with monitoring. Go ahead and specify the http URL.
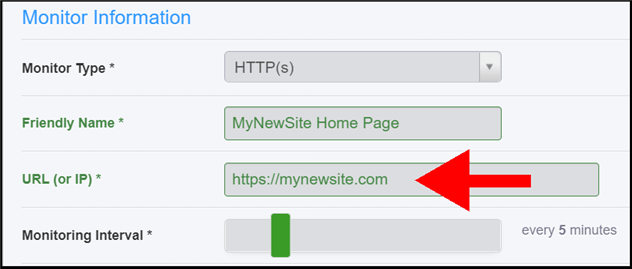
Monitoring Interval
We’ll leave the default monitoring interval at 5 minutes.
If you try to reduce it, you’ll be invited to upgrade to the paid plan. You can freely increase it, but there’s rarely a reason to do so.
Advanced Settings
The section for Advanced Settings is collapsed by default. If you expand the section, you’ll see a variety of options. All but one are only available on the paid tier.
The exception is the Authentication Settings. You’ll use this if you have a membership site where the home page is behind a login and password.
Step 5: Confirm The Contact For Alerts
The default contact is the email you used to sign up for your Uptime Robot account. Just tick the box to confirm here.
If you want to set up a different contact method, then you’ll need to jump to the Settings page to create a new contact.
Step 6: Create And Close
You’ve completed the necessary set-up steps.
Hit the “Create” button and then you can close the set-up page.
Step 7: Check That Your Uptime Robot Monitor Is Working
You should take a look at the dashboard to be sure that you’ve entered the correct details.
When you click on the monitor entry on the left-hand side of the dashboard, you want to see a green “Up” status on the detailed pane on the right. It should look like this:
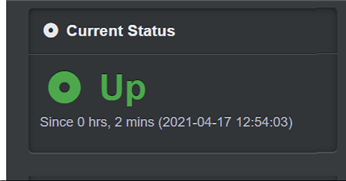
If you see that the current status is green, then your setup is correct. You have successfully added an uptime monitor for your website.
Troubleshooting setup issues
It’s perfectly possible to add an invalid URL! The monitor will kick in, and of course, will report failures. The dashboard will look something like the picture below, with a big red-lettered status of DOWN.

Editing Your Monitor
Here’s a tip from experience: if you have to edit the details, you may also need to pause and restart the monitor.
The status will change to “Not Checked”.
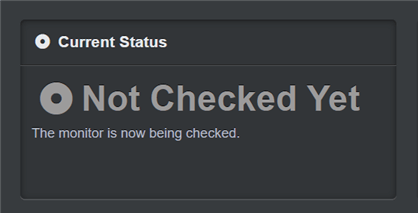
Wait for five minutes and take another look at the dashboard. It should show the green “Up” status.
If you continue to have problems after you made an initial mistake, you can delete the monitor and start again. It literally takes under a minute to create another monitor.
How to Set Up Other Types Of Uptime Robot Monitors
With standard websites, you may only need the HTTP(s) type of monitor.
However, you may also want to take a look at keyword monitors. This service can alert you if your website has been hacked and your web pages defaced in some way. We have a separate tutorial on how to set up an Uptime Robot Keyword Monitor.
The rest of the types are more specialist.