This tutorial isn’t about how to make the best Google web stories. You’ll find plenty of videos for that.
When I first watched those videos, I was completely confused. The steps they took didn’t seem to exist in the WordPress story editor. That’s because the interface has greatly changed.
This article is to get you started with a step-by-step guide to:
- Create a simple story with images, text, and animations
- Add links from story pages to your web posts
- Add the mandatory meta details to allow Google Discover pick up your story
- Post-publishing tasks to give the story a better chance of being indexed
- Making your Google Analytics work with stories
Table of Contents
Main Changes to The Story Editor.
Before you watch some YouTube tutorials, I suggest you follow the steps in this article to create a basic story.
By doing so, you’ll know how to find the main editing features in the story editor.
As these features have moved drastically in recent changes, you won’t get lost when you’re following some more advanced tutorials elsewhere.
The older editor had a right sidebar to access editing features for the page you’re working on. That sidebar is gone.
Most (but not all) of the editing features have been put under the “Styles” tab in the left sidebar.
With that out of the way, let’s get started…
Step 1: Install the Google Web Stories Plugin on WordPress
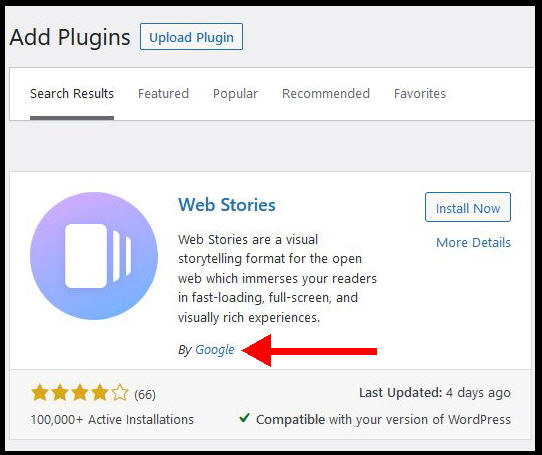
Use the WordPress dashboard to add a new plugin. You’ll find it when you search for “google web stories.
Add the official web stories plugin from Google. This picture shows what it looks like:
Step 2: Start Your First Story
If you don’t use a template, you will create your first story with a blank canvas.
When you click “add new story”, you are placed in the editor with a single page.
If you’re familiar with how web stories look on your phone, you may think this first page is the cover poster that shows up in Discover. It isn’t.
This is the first page that appears after users click into your story.
To get going, click on the image icon and select the options to grab a stock image. Google will show you images from from Unsplash.

When you select an image, it appears as an element on the page.
Right-click the image and choose “Set as Page Background” from the bottom of the menu.
Step 3: Insert Your First Link On The First Page
You want every page to have a link to your website. If the web story is based on a single blog post, then every page will have the same link.
The easiest way to make web stories is to get your first page looking good with a clearly visible link. Then keep duplicating that page to make the rest of your story.
Call to Action
To add a link, click on the styles tab in the left sidebar.
Expand the “Call to Action section and enter the link to your target blog post or page.
You will immediately see a small “Learn more” box appear at the bottom of the page.
The editing options let you change that text. I leave it at the default in the assumption that users know it’s a jump link to a website.
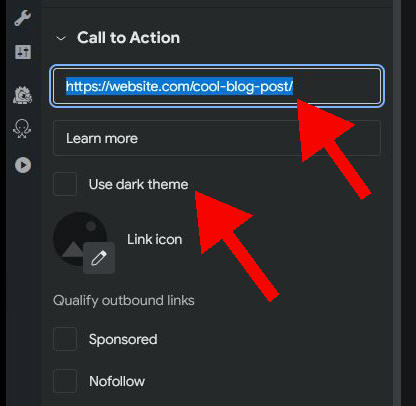
Light or dark theme?
It’s more important to pay attention to the visibility of the box. You can change it from being a lightly-colored box to a dark theme.
The key is what makes it stand out against the image or color scheme in that section of the page.
It’s worth toggling and checking this on every page.
You should also pick background images that are least likely to obscure the box. Make sure that the bottom section of a background image is fairly muted.
If your image is an infographic, you don’t want any of the information to be in this bottom section.
Tracking links in Google Analytics
If you just add a simple link as your call to action to your web posts, you won’t find it easy to track the traffic coming from your stories to your posts.
The trick is to add UTM parameters to your links.
Let’s say your link is: “https://mywebsite.com/cool-post/“
Use this instead: “https://mywebsite.com/cool-post?utm_source=discover&utm_medium=organic&utm_campaign=web_story/”
This will let you drill down into the traffic in Google Analytics in fine detail.
Step 4: Duplicate The Page
All we have is an image and a link, but that’s enough to get going. You can come back to page 1 and make it better.
For now, duplicate the page using the “+” icon beside it.
Remove the background image with these steps:
- right-click on the page
- choose “detach image from background”.
- Click on the image and use your keyboard to delete it (yes, this is stupid, but I haven’t found another way to do this)
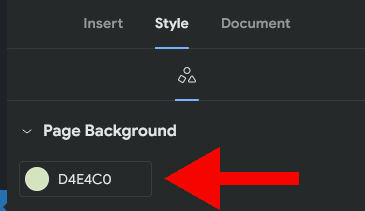
Step 5: Set A Background Color
You don’t need a full image on every page. But you probably don’t want the sparse white of the default page.
The style tab lets you set the page background color.
Step 6: Add An Image As An Element On The Page
I’ve put this as a separate section because it took me an hour to figure out how to upload or select images from my own media library (instead of the third-party one).
The reason is the awful interface that uses the same icon to do different things.
To grab an image from your media library, use the “Insert” tab on the left sidebar.
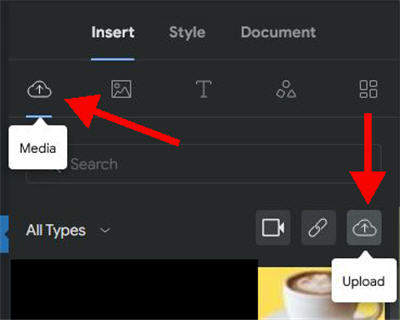
The first upload icon represents your media library. This gives you an interface into the library, but you can only see a few images in the small panel.
The second upload icon opens the standard media library interface. From here, you can upload an image from your local drive or grab one that’s already in the library.
What is the safe zone?
If this is your first go at using the editor, a hint will pop up to tell you to keep your added elements in a “safe zone”.
But the safe zone isn’t always clear. You can see it if you click and move an image or text box on the page. That will show an oblong box that represents the zone.
Step 7: Add A Text Box, Filling, And Animation
Use the Insert tab to add a text box to the page.
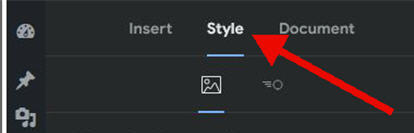
When you’ve selected the text box, use the Style tab to access the editing features.
Most of the features are fairly self-explanatory. One of the less obvious options is that you can add a filled box around your text.
That lets you ensure the text is easy to read if superimposed on an image.
Adding animation
Have you seen other web stories where the text drops down from the top?
This movement is called an “animation”. To add animation to an element, click on it and look for the winged icon that is in several places in the editor.
You’ll see it beside the page when a text or image element is selected. We show it in the picture below.
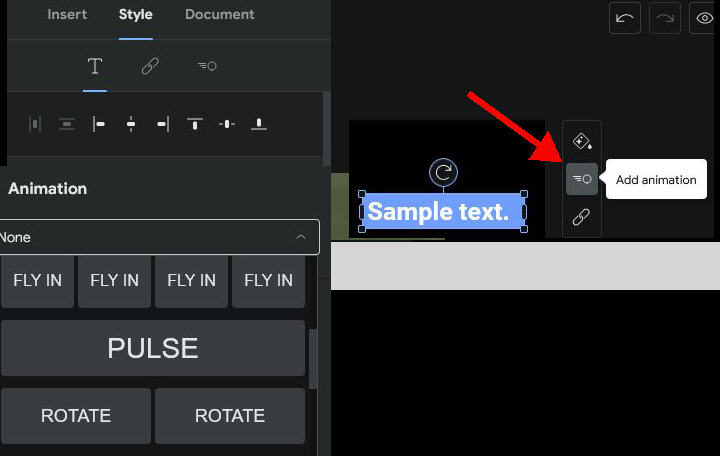
You’ll also see the icon at the top-right of the Style tab.
This gives you access to plenty of different animations.
Step 8: Cover Page And Meta Tags
I’ll assume now that you’ve created a flowing story of multiple pages.
Now we’re going to add the mandatory features That Google requires of a web story:
- Title
- Poster image
- Logo
- Description
- URL
You set the title at the top of the dashboard.
The other details are set in the Document tab in the left panel.
Poster image
The title will be superimposed as white text on the image you choose as the poster. The text will appear in the bottom left corner of the image.
This image should be 650 X 853 pixels. The editor will let you crop it if you have something bigger.
One mistake to avoid is assuming that all other background images should be that size. In fact, they should be much bigger. Go for at least 1080 X 1920 for your other images.
Previewing the title page?
One annoying aspect of the editor is that the option to preview the title page seems to come and go. Hopefully, this feature will be fixed when you are creating your story.
But if you have to publish the story without seeing a preview, be sure to check it somewhere after it’s out. You want any words to be clearly visible.
Step 9: Work Through The Editor Checklist
The editor provides a validation feature that points out where you may have violated best practices.
You’ll find it on the bottom left of the editor.
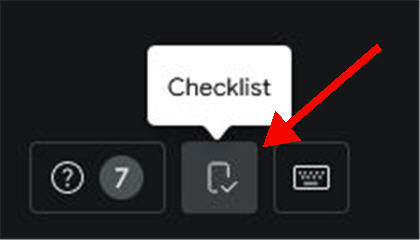
It’s important to work through these to give your stories the best chance of being picked up in Google Discover.
However, some don’t always make sense.
I got a warning about text and background colors not contrasting enough when it was white text on black. When I changed from white to pale yellow, the warning went away.
The recommended number of words also seems to be a lot higher than what Google has said elsewhere.
Step 10: Publish, Validate, And Add Links For Indexing
When you hit publish on your story, your tasks aren’t finished.
The first thing to do is to check that this is a valid web story. Google provides a validation tool to test the URL.
If you’re wondering what the URL is, you will now have an archive that lists your stories at [domain]/web-stories/
Problems?
I removed AMP from my website over a year ago, and I didn’t have any problem with this check.
I also didn’t do anything special about canonical links.
However, other people have reported plenty of problems being thrown up in the check. This may be down to conflicts with plugins.
You’re unlikely to be the first person to experience the problem, so hopefully, a search will throw up some advice.
Indexing And Links
You should give Google a bit of help to index your story. Here are some tasks to do now.
Submit the URL of the story for indexing via Google Search Console.
Add a link to the web story from any existing posts or pages that are associated with the information.
Setting Up Google Analytics For Web Stories
Both Google and advertising networks advise that you separate your story traffic from the usual sources in Google Analytics.
I simply followed these steps from Mediavine.
Yes, this is a purely UA property. What happens when the big switch to GA4 happens? These instructions will change.
I wondered if it was enough just to add a property. Should I not have to add a filter to the view accessed by Mediavine?
I sent them an email to ask about it, and they said I just needed the steps in the linked document above.
Further actions for Mediavine
If you’re with Mediavine, then you have hooked up a view in Google Analytics to the network.
Mediavine also advises that you take another step to avoid web stories messing up your analytics.
Basically, you’ll be adding filters to exclude query parameters from web stories traffic.